de Cor's Handmades - Handmade Jewelry Malaysia: Q and A
Showing posts with label Q and A. Show all posts

Sunday, June 6, 2010

KnowHow: Make Your Product Picture presentable in 3 seconds

P1010362 


A dear friend was planning to start a business in Etsy but have no idea how she should start. I gave her some guidance and told her one of the most important key to success. Few days later she then sent me the above picture, saying:
“I don’t know why it turned out so… blue. I have already took your advice – morning light and clear background, camera settings etc, what did I do wrong?”

I took her picture, and fired up my Photoshop CS4. Believe it or not, in less than 3 seconds, I’ve turned the picture to become like this:
P1010362e2wm
Amazing! Yes or yes?! SAY YES of course! Hehe.
I sent a copy of this above picture, and told her that now she can use this picture for her product listing. By the way, she is in the midst of taking inventory and deciding what to sell and what to ditch, I will announce her store here in my blog when her store launched! :)

So now!

Anyone interested to know how to do this? We all know it is extremely important to take a good picture so that our product can SELL! You may have the greatest product but yet got stuck because you’ve presented an UGLY photo of your product!!!

Now – I have created a vote and poll, to know what you think. Leave me a message and If I have enough readers want to know how to do this in 3 seconds, I will write a simple instruction for FREE. Why do I do this? Cause I want to help, and am in no interest to give you something you don’t need, simple as that.

P/S The watermark is to protect the photo whilst it’s displayed in my site.
Smile!!! It’s Sunday!!

Corra @ Malaysia

Monday, December 7, 2009

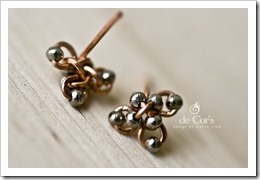
Snowflakes Studs, Wired Chinese Knot

 IMG_7836 IMG_7838IMG_7839 IMG_7834IMG_7840
Question: Is it possible to create a pair of studs earrings out from Snowflakes Earrings Tutorial that you’ve released for last year’s Christmas?
Answer: Of course.

In fact I have plans. A little something for you my dear readers, for those who have had the Snowflakes Earrings Tutorial since last year.
To make this pair of studs earrings, this is all you need to prepare:
Materials:
  1. 2” of 20ga dead soft round wires
  2. 7 X 2.5mm round beads (make sure the bead hole allows 20ga wires to go through)
Tools:
  1. Round nose pliers
  2. Flat nose pliers
  3. Flush cutter
  4. Ruler
Basic and Quick Instructions:
Step 1: Measure 1” from one end for both wires
Step 2: Make a cross and then insert one bead at each exit wires.
Step 3: Tie the Snowflakes knot as instructed in Snowflakes Tutorial.
Step 4: Now you will have 4 exit wires after tying the knot, choose ONE of the exit wires and fold it 90 degrees behind – this will become your post earrings wires. Measure 8mm for the rest of THREE exit wires and trim away the excess, use your round nose pliers to make a loop on each wires.
Step 5: Push each loop down to open them sideway, insert ONE bead to each loop. Push it back up to close the loop and you’re done.

Pretty simple isn’t it? I would love to spend more time creating more stuff but I really am very tight up recently, so I does everything in mind first. It took me 2 hours to visualize it in my mind before I execute it, and I’ve spent 30 minutes for the actual work, as what one of my very wise friend said: Everything that happens, happens two times, once in our mind and once when it happens because we made it happen. :)

Good luck, and say you love me!
-Me-

Sunday, May 24, 2009

Trios - Hoops Earrings

IMG_3964 IMG_3970 IMG_3972 IMG_3976 IMG_3978 IMG_3982

Technique/ Reference:

Braided Cross Tutorial

ZHU Knotted Hoops Tutorial

Moana Hoops Earrings Tutorial by Erin


Question:

“Can it be made using just plain wire, and not coiled wire? The coiled wire makes it more feminine in my opinion...and would be great for a lady, but for a man, I'd prefer regular plain wire.”

Answer:

“Coiled wires are more versatile for design as such. You could, however, try this design with plain wires but it has to be 26ga or 24ga, nothing thinner else you won't be able to see the knots...”

So…

Today I gave it a try of the mentioned answer just to proof the concept. A returning customer of mine (thank you!) dropped me a convo at Etsy requesting for a pair of Hoops Earrings. “Do whatever you want.”, she added. Don’t you just like a request like this? Get to close a deal yet able to make something totally your way? :)


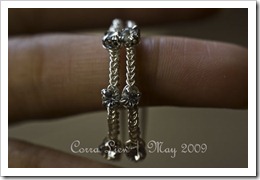
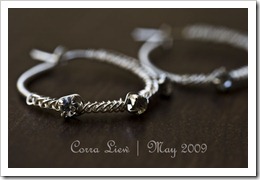
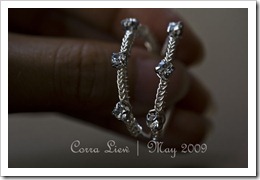
So here’s the Hoops Earrings. She always like her stuff blings, so I attached 3 CZ Diamond cut stones to the hoops, utilizing the same knotting introduced in Braided Cross Tutorial without coiling the wires, and thankfully it turned out to be neat too! Hope she will like it, and hope you would like it too!


Enjoy your Sunday!

-Me-

Friday, May 22, 2009

Rosabella and it’s tips

image

Click on the picture to go to the above webpage.
A customer posted a question for this tutorial and I thought I’d share some tips over here (spread too thin I am, but definitely updating JL site soon about these tips).

Question:
“Really have tried with this one. Step by step the first two pages of instructions just don't seem to follow with what I have done.....pity as it is quite lovely...any help would be appreciated”
Tips:
  1. When the tutorial arrives, remember to read through it once or more times FIRST to understand the whole process, best if you could visualize and practice it in your mind. (Trust me this works, I studied Perri’s Celtic Braid tutorial for 2 hours and then go to bed, and practice it in my mind in the next whole day. I was as though going for an exam!)
  2. Orient your tools and wires exactly like how I’ve positioned them in the tutorial.
  3. Accidentally found workaround: There's a little trick I've discovered when I sprained my wrist awhile ago. My wrist were too weak and my fingers could not hold on the wires. But I had to create a Rosabella in a particular way for a proof of concept so that I could finally move on. So I used a nylon pliers to clip at the petals before pulling wires through the spaces to form another petal (you will understand what I am trying to say when you try out the tutorial), so if you are having hard time to hold the petals with fingers you might want to consider that.
Head up:
Rosabella design looked simple – but it is actually not. Any experienced wire jewelry maker knew it takes too much to make something looked simple, Rosabella is a typical example for case as such and IMHO, the more experiences you have with wires, the more you need to forget. I forget my own designs all the time. I had to revisit my own tutorial(s) every single time when I received an order for those designs. Knotting with wires were never easy, I have never able to write a “simple” tutorial for any knotted designs, that is actually one of my vision for this year and I do hope I would achieve that soon. So please bear with me for the time being, don’t be discouraged, don’t give up too soon. May be you can try to forget everything you have learned about wire jewelry, forget about what I have taught you in other tutorials too every time you start a new project, and try this one out slowly as though you’re learning to make jewelry with wires for the very first time.

Related Articles: Rosabella Design
Technique(s): Rosabella Tutorial, ROSE Tutorial
Happy Friday!
-Me-